安装Wazuh manager
使用Ubuntu系统,目前wazuh版本为3.10
添加更新源
apt-get update
apt-get install curl apt-transport-https lsb-release
#需要python2.7以上
curl -s https://packages.wazuh.com/key/GPG-KEY-WAZUH | apt-key add -    #添加更新源
echo "deb https://packages.wazuh.com/3.x/apt/ stable main" | tee -a /etc/apt/sources.list.d/wazuh.list          #更新包
apt-get update
安装Wazuh Manager
apt-get install wazuh-manager
service wazuh-manager status         #检查运行状态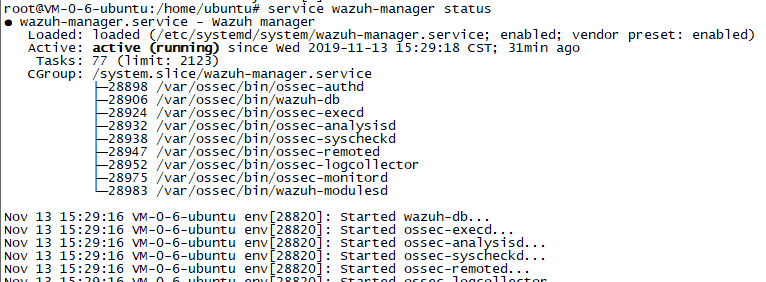
安装Wazuh API
如果不能直接安装nodejs需要添加更新源安装
curl -sL https://deb.nodesource.com/setup_8.x | bash -
apt-get install nodejs
apt-get install wazuh-api
service wazuh-api status                #检查运行状态
sed -i "s/^deb/#deb/" /etc/apt/sources.list.d/wazuh.list     #禁用Wazuh更新源
apt-get update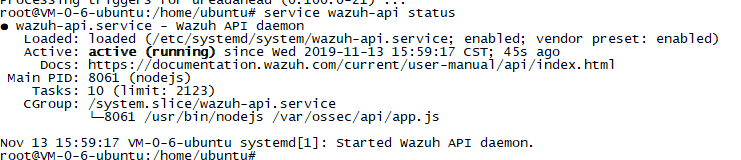
配置API用户信息,启用HTTPS,可以使用脚本生成证书或者自动生成证书,以下自动生成证书,同时还可以修改访问API的用户,默认用户密码是foo和bar。如需要修改记得重启服务。
# 配置端口账户等信息
cd /var/ossec/api/scripts
./configure_api.sh
#不使用脚本修改
cd /var/ossec/api/configuration/auth
node htpasswd -Bc -C 10 user myUserName
安装Filebeat
Filebeat是Wazuh服务器上的工具,可以将警报和归档事件安全地转发到Elastic Stack服务器上的Logstash服务。
添加源存储库和密钥:
apt-get install curl apt-transport-https
curl -s https://artifacts.elastic.co/GPG-KEY-elasticsearch | apt-key add -
echo "deb https://artifacts.elastic.co/packages/7.x/apt stable main" | tee /etc/apt/sources.list.d/elastic-7.x.list
apt-get update
安装
apt-get install filebeat=7.4.2从Wazuh存储库下载Filebeat配置文件。这是预先配置的,用于将Wazuh警报转发到Elasticsearch:
curl -so /etc/filebeat/filebeat.yml https://raw.githubusercontent.com/wazuh/wazuh/v3.10.2/extensions/filebeat/7.x/filebeat.yml下载Elasticsearch的警报模板:
curl -so /etc/filebeat/wazuh-template.json https://raw.githubusercontent.com/wazuh/wazuh/v3.10.2/extensions/elasticsearch/7.x/wazuh-template.json下载适用于Filebeat的Wazuh模块:
curl -s https://packages.wazuh.com/3.x/filebeat/wazuh-filebeat-0.1.tar.gz | sudo tar -xvz -C /usr/share/filebeat/module编辑文件,/etc/filebeat/filebeat.yml并用YOUR_ELASTIC_SERVER_IPElasticsearch服务器的IP地址或主机名替换。例如:
output.elasticsearch: hosts: ["192.168.120.128:9200"]启用并启动Filebeat服务:
systemctl daemon-reload
systemctl enable filebeat.service
systemctl start filebeat.service
安装Elastic Stack
添加弹性存储库及其GPG密钥:
apt-get install curl apt-transport-https
curl -s https://artifacts.elastic.co/GPG-KEY-elasticsearch | apt-key add -
echo "deb https://artifacts.elastic.co/packages/7.x/apt stable main" | tee /etc/apt/sources.list.d/elastic-7.x.list
apt-get update
安装Elasticsearch软件包:
apt-get install elasticsearch=7.4.2需要Java环境,例如安装openjdk
apt install openjdk-11-jre-headless此处网速影响,挂VPS下载软件包解压使用。
如果使用源安装编辑文件/etc/elasticsearch/elasticsearch.yml并取消注释设置,将Elasticsearch配置为侦听非回送地址network.host。将值更改为要绑定到的IP:
network.host: <elasticsearch_ip>更改network.host选项后,需要进一步配置。在文件中添加或编辑(如果有注释)以下几行/etc/elasticsearch/elasticsearch.yml:
node.name: <node_name>
cluster.initial_master_nodes: ["<node_name>"]如果使用下载文件包启动方式,编辑文件elasticsearch/config/elasticsearch.yml来执行如上操作。
修改完成后启动ES。
systemctl daemon-reload
systemctl enable elasticsearch.service
systemctl start elasticsearch.service

文件启动的话,需要非root用户启动
检查启动是否正常
curl http://192.168.120.128:9200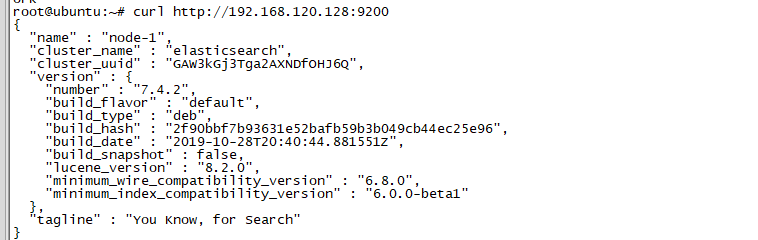
安装Kibana
源安装
apt-get install kibana=7.4.2安装适用于Kibana的Wazuh应用程序插件:
从URL安装:
sudo -u kibana /usr/share/kibana/bin/kibana-plugin install https://packages.wazuh.com/wazuhapp/wazuhapp-3.10.2_7.4.2.zip从软件包安装:
sudo -u kibana /usr/share/kibana/bin/kibana-plugin install file:///path/wazuhapp-3.10.2_7.4.2.zip编辑文件/etc/kibana/kibana.yml,修改设置server.host
server.host: "192.168.120.128"   //修改为主机地址
elasticsearch.hosts: ["http://192.168.120.128:9200"]  //修改为es的主机地址,此处使用同一台主机
启用并启动Kibana服务:
systemctl daemon-reload
systemctl enable kibana.service
systemctl start kibana.service
禁用Elasticsearch更新:
sed -i "s/^deb/#deb/" /etc/apt/sources.list.d/elastic-7.x.list
apt-get update
如果出现Kibana server is not ready yet问题,可能是kibana和es的版本不一致,尝试修改为同一版本,或者是elasticsearch.hosts没有修改为主机的IP,尝试修改为主机IP,再或者是还没刷新成功,等待一会。
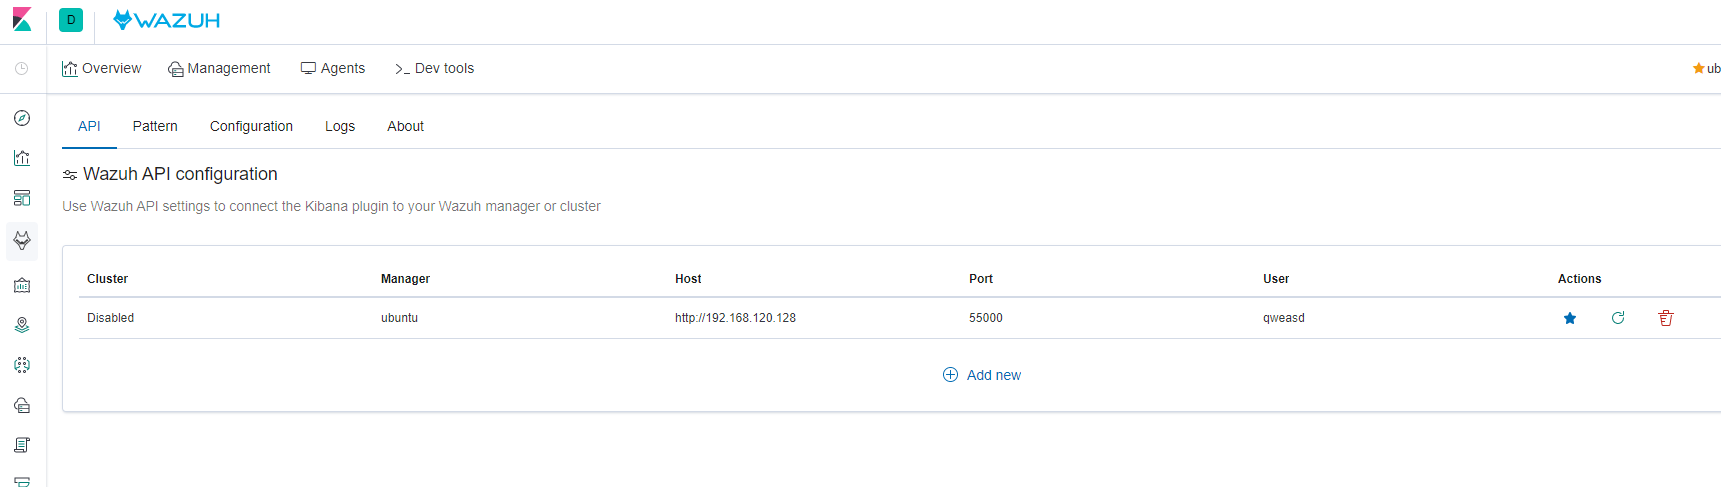
选择小狐狸头像,配置API认证,如果修改了则填入设置的账号密码。
下载模版文件
# 下载filebeat配置文件
curl -so /etc/filebeat/filebeat.yml https://raw.githubusercontent.com/wazuh/wazuh/v3.9.2/extensions/filebeat/7.x/filebeat.yml
chmod go+r /etc/filebeat/filebeat.yml

# 下载elasticsearch的模版文件
curl -so /etc/filebeat/wazuh-template.json https://raw.githubusercontent.com/wazuh/wazuh/v3.9.2/extensions/elasticsearch/7.x/wazuh-template.json
chmod go+r /etc/filebeat/wazuh-template.json
配置Filebeat
output.elasticsearch:
  hosts: ['http://YOUR_ELASTIC_SERVER_IP:9200']

# 修改为
output.elasticsearch:
  hosts: ['http://192.168.120.128:9200']
安装Wazuh agent
以上安装可以在一台服务器中,此处agent则需要在需要监控的主机上安装,把agent安装到kali机中。
添加存储库
apt-get install curl apt-transport-https lsb-release gnupg2安装Wazuh存储库GPG密钥:
curl -s https://packages.wazuh.com/key/GPG-KEY-WAZUH | apt-key add -添加存储库:
echo "deb https://packages.wazuh.com/3.x/apt/ stable main" | tee /etc/apt/sources.list.d/wazuh.list更新软件包
apt-get update使用如下安装还需要配置注册,可以手动注册或者脚本注册
apt-get install wazuh-agenthttps://github.com/wazuh/wazuh-api/blob/master/examples/api-register-agent.sh
使用如下安装和部署,需要携带定义的变量,变量说明列表
https://documentation.wazuh.com/3.10/user-manual/registering/index.html#register-agents
WAZUH_MANAGER="192.168.120.128" apt-get install wazuh-agent //wazuh-api地址,多个服务使用逗号分隔或者下载软件包安装,使用脚本注册
https://packages.wazuh.com/3.x/apt/pool/main/w/wazuh-agent/wazuh-agent_3.10.2-1_amd64.deb
#!/bin/bash

###
#  Shell script for registering agents automatically with the API
#  Copyright (C) 2017 Wazuh, Inc. All rights reserved.
#  Wazuh.com
#
#  This program is a free software; you can redistribute it
#  and/or modify it under the terms of the GNU General Public
#  License (version 2) as published by the FSF - Free Software
#  Foundation.
###


# Connection variables
API_IP="192.168.120.128"    #wazuh-api 地址
API_PORT="55000"
PROTOCOL="http"
USER="qweasd"
PASSWORD="qweasd"

display_help() {
cat <<HELP_USAGE
    $0  [-h] [-f|--force] [-q|--quiet] [agent]
   -h             Show this message.
   -f|--force     Force agent removal (if already registered)
                  The agent will be re-regitered with a new ID
   -s|--silent    Surpress the output while removing the agent
   agent          Agent name (if missing we will use the output
                  of the hostname command)
HELP_USAGE
}

register_agent() {
  # Adding agent and getting Id from manager
  echo ""
  echo "Adding agent:"
  echo "curl -s -u $USER:**** -k -X POST -d 'name=$AGENT_NAME' $PROTOCOL://$API_IP:$API_PORT/agents"
  API_RESULT=$(curl -s -u $USER:"$PASSWORD" -k -X POST -d 'name='$AGENT_NAME $PROTOCOL://$API_IP:$API_PORT/agents)
  echo -e $API_RESULT | grep -q "\"error\":0" 2>&1

  if [ "$?" != "0" ]; then
    echo -e $API_RESULT | sed -rn 's/.*"message":"(.+)".*/\1/p'
    exit 1
  fi
  # Get agent id and agent key
  AGENT_ID=$(echo $API_RESULT | cut -d':' -f 4 | cut -d ',' -f 1)
  AGENT_KEY=$(echo $API_RESULT | cut -d':' -f 5 | cut -d '}' -f 1)

  echo "Agent '$AGENT_NAME' with ID '$AGENT_ID' added."
  echo "Key for agent '$AGENT_ID' received."

  # Importing key
  echo ""
  echo "Importing authentication key:"
  echo "y" | /var/ossec/bin/manage_agents -i $AGENT_KEY

  # Restarting agent
  echo ""
  echo "Restarting:"
  echo ""
  /var/ossec/bin/ossec-control restart

  exit 0
}

remove_agent() {
  echo "Found: $AGENT_ID"
  echo "Removing previous registration for '$AGENT_NAME' using ID: $AGENT_ID ..."
  # curl -u foo:bar -k -X DELETE "https://127.0.0.1:55000/agents/001
  REMOVE_AGENT=$(curl -s -u $USER:"$PASSWORD" -k -X DELETE $PROTOCOL://$API_IP:$API_PORT/agents/$AGENT_ID)
  echo -e $REMOVE_AGENT
}

get_agent_id() {
  echo ""
  echo "Checking for Agent ID..."
  AGENT_ID=$(curl -s -u $USER:"$PASSWORD" -k -X GET $PROTOCOL://$API_IP:$API_PORT/agents/name/$AGENT_NAME | rev | cut -d: -f1 | rev | grep -o '".*"' | tr -d '"')
}

# MAIN
# ENTRY POINT

while getopts ':hfs' OPTION; do
  case "$OPTION" in
    h)
      display_help
      exit 0
      ;;
    f|--force)
      FORCE=true
      ;;
    s|--silent)
      SILENT=true
      ;;
  esac
done
# reset $1, $2 .... as normal argument after the flag
shift $(($OPTIND - 1))

# if no arguments are passed in after the flags, we assign the hostname value to the AGENT_NAME
AGENT_NAME=${1:-$(hostname)}

get_agent_id

# check the return value. If we get an integer back then the agent is already registered. Anything else -> agent is not registered
  if ! [ "$AGENT_ID" -eq "$AGENT_ID" ] 2> /dev/null ; then
   echo "Starting registration process ..."
   :
  elif [[ "$FORCE" = true && "$SILENT" = "true" ]] ; then
   remove_agent > /dev/null 2>&1
  else
    if [[ "$FORCE" = true ]] ; then
      remove_agent
    fi
  fi

# Default action -> try to register the agent
register_agent
配置好后,访问wazuh界面中的agent就可以看到连接状态了
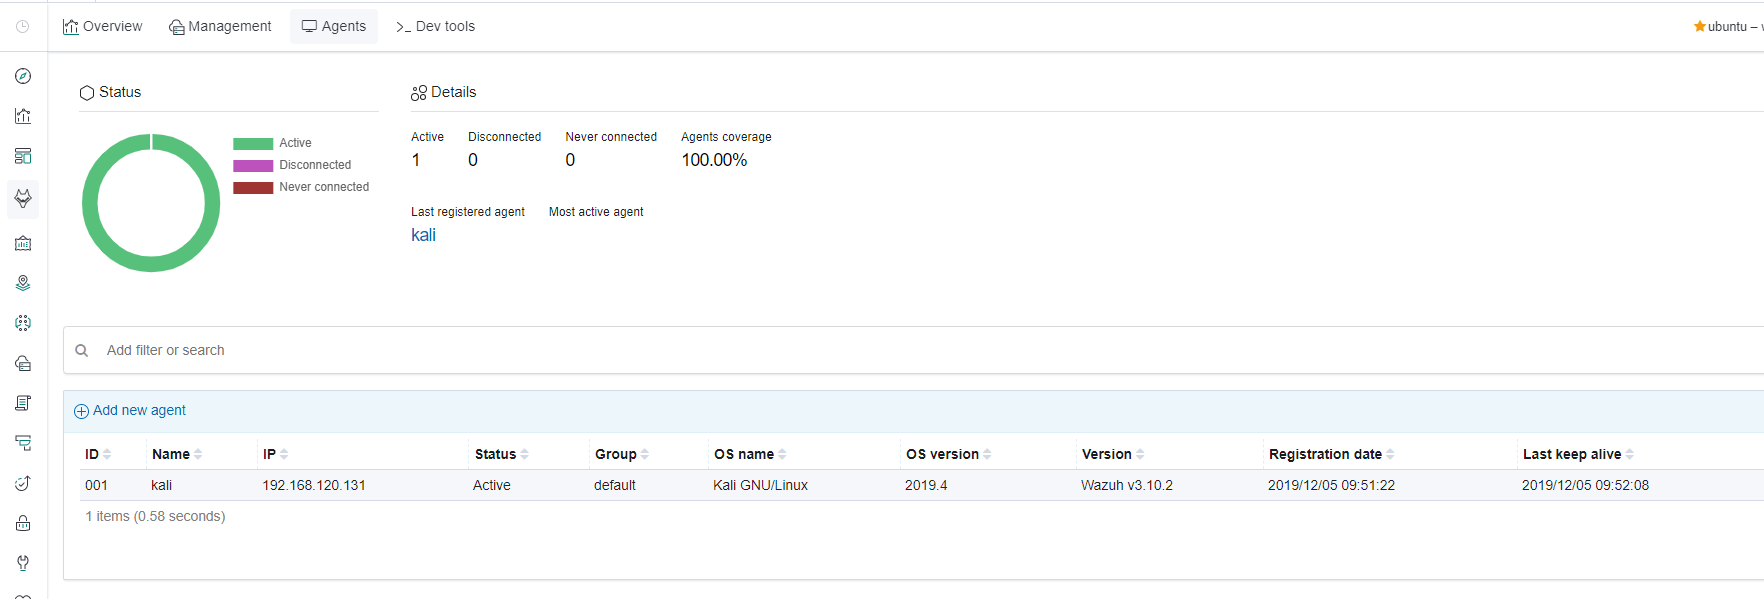
在Inventory data中可以看到主机的网卡,网络连接,软件包等信息。

配置文件 /var/ossec/etc/ossec.conf文件完成性监控,同时需要修改server端的获取时间和配置
<frequency>43200</frequency>   #默认为十二小时,此处修改为100秒
<!-- File integrity monitoring -->
<syscheck>
	<disabled>no</disabled>   #文件完整性监控,默认为no
<syscheck>
  <directories check_all="yes" realtime="yes">/tmp</directories> #实时扫描,仅使用目录
</syscheck>
<syscheck>
  <frequency>36000</frequency>              #计划扫描,每十小时一次
  <directories>/etc,/usr/bin,/usr/sbin</directories>   #计划扫描的目录
  <directories>/bin,/sbin</directories>
</syscheck>
<syscheck>                 #包含了实时扫描,同时带有who-data信息
  <directories check_all="yes" whodata="yes">/etc</directories>
</syscheck>
<rule id="100345" level="12">   #基于规则检测报警,规则id来自Management/Ruleset
  <if_group>syscheck</if_group>
  <match>/var/www/htdocs</match>
  <description>Changes to /var/www/htdocs - Critical file!</description>
</rule>

<directories check_all="yes">/etc,/usr/bin,/usr/sbin</directories>  #要检查的目录(执行所有可能的验证)
<ignore>/etc/mtab</ignore>   #要忽略的目录
如果启用了whodata字段,需要执行以下安装
apt install auditd
auditctl -l | grep wazuh_fim #检查是否应用了用于监视所选文件夹的审核规则:-w /etc -p wa -k wazuh_fim命令监控,必须将代理显式配置为接受远程命令,文件/var/ossec/etc/local_internal_options.conf
logcollector.remote_commands=1根据文档建议,修改/var/ossec/etc/shared/agent.conf文件,如果包含多个组文件夹,需要到每个组文件夹下修改配置文件,name,os,profile是可以设置。
<agent_config name="agent_name">
    <localfile>
        <location>/var/log/my.log</location>
        <log_format>syslog</log_format>
    </localfile>
</agent_config>

<agent_config os="Linux">
    <localfile>
        <location>/var/log/linux.log</location>
        <log_format>syslog</log_format>
    </localfile>
</agent_config>

<agent_config profile="database">
    <localfile>
        <location>/var/log/database.log</location>
        <log_format>syslog</log_format>
    </localfile>
</agent_config>

<agent_config name="kali">
    <localfile>
    	<log_format>command</log_format>   #command 指逐行读取
    	<command>df -P</command>
	</localfile>
	<localfile>
    	<log_format>full_command</log_format>  #全部匹配查找
    	<command>netstat -tan |grep LISTEN |egrep -v '(127.0.0.1| ::1)' | sort</command>
  	</localfile>
</agent_config>
漏洞检测,需要配置agent端和server端/var/ossec/etc/ossec.conf
agent端
<wodle name="syscollector">
  <disabled>no</disabled>
  <interval>1h</interval>
  <packages>yes</packages>
</wodle>
server端
<wodle name="vulnerability-detector">
  <disabled>no</disabled>
  <interval>5m</interval>
  <run_on_start>yes</run_on_start>
  <feed name="ubuntu-18">
    <disabled>no</disabled>
    <update_interval>1h</update_interval>
  </feed>
</wodle>
systemctl restart wazuh-manager  #重启
虚拟机
当然,如果觉得以上安装过于繁琐,可以选择虚拟机安装一个wazuh服务端,仅在64位系统中运行。不建议在生产中直接使用。
https://packages.wazuh.com/vm/wazuh3.10.2_7.3.2.ova
root密码为wazh,api密码为默认的foo/bar。
安装的Elasticsearch /usr/share/elasticsearch。Filebeat安装在中/usr/share/filebeat,其配置文件位于中/etc/filebeat/filebeat.yml。
启动服务和重启相关服务
systemctl restart wazuh-manager
systemctl restart wazuh-api
systemctl stop elasticsearch
systemctl start filebeat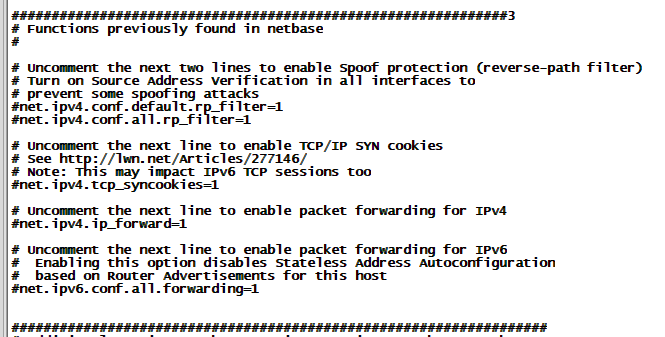
systemctl status kibanakibana地址为https://IP,在如下界面中即可看到wazuh做的相关配置检查,和建议。此建议开启tcp_syncookies来处理DOS攻击中的SYN握手的资源消耗。
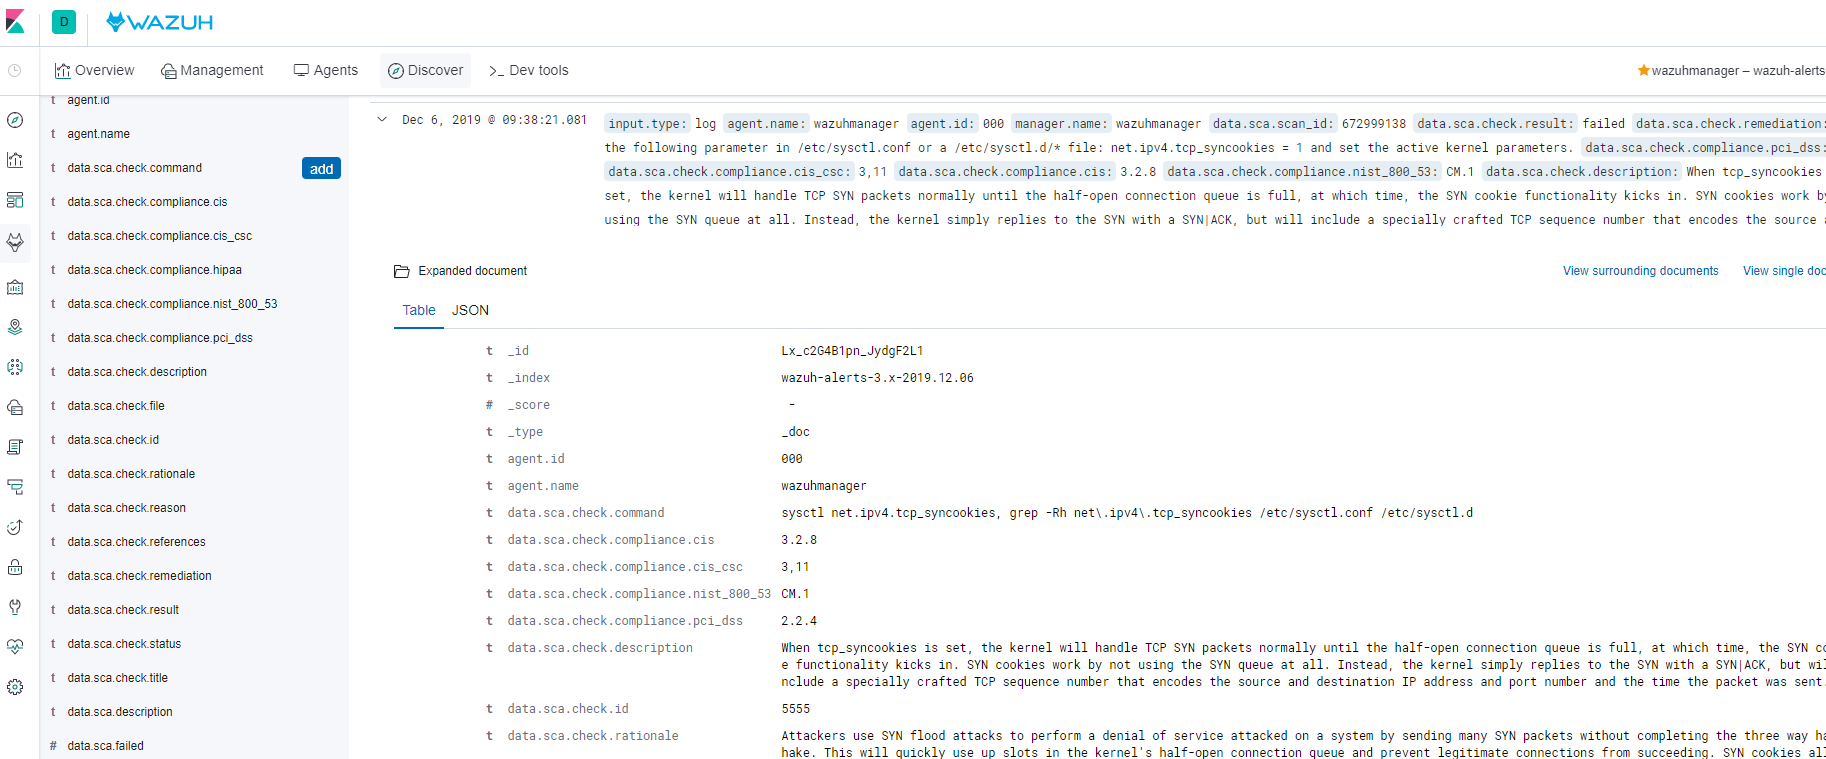
根据配置文件查看对应配置是否开启,配置默认关闭,根据需求来判断是否开启。